
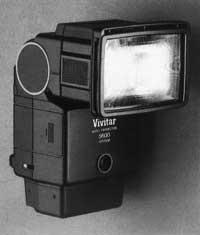
Electronic flash
Elhuyar Fundazioa
Its light has the same color temperature as that of the clear day and illuminates a relatively large space with an instant, but as the distance increases the intensity decreases a lot.
Having the shutter fully open during brightness, flash brightness and shutter speed must be synchronized. In cameras with central shutter this is not a problem. In focal plane shutters, on the contrary, the flash does not allow any shutter speed to be used, but rather the synchronization speed that the camera itself indicates with a special color or mark. Normally this speed is usually 1/60 s and in the most recent cameras can be 1/125 or 1/250 s.
The easiest way to calculate exposure is by using the guide number. This number depends on the ISO sensitivity of the film (usually 100 ISO) and each flash brings its own.
The speed of exposure depends on the flash flash flash speed (the most common flash is usually 1/500 s), and since the distance and brightness that the subject receives varies its power, we will have to select the right diaphragm (so we will have to control the exposure by opening the diaphragm). To do this we will divide the guide number by the distance between the flash and the subject and the result will be the diaphragm to be placed (if using a 100 ISO film, of course).

However, with no calculations required, most flashes include a table indicating the distance and aperture of the diaphragm to be used based on the sensitivity of the film.
These theoretical calculations are made for relatively clear walls of normal size. Whether the room is very large or the walls are very dark, or if you work outside, the brightness power drops in half, as the light is not reflected. In these cases, the diaphragm should increase one step.
In addition to the manual, there are flashes of automatic use. The device itself, using the photoelectric cell that has in its front, decides the flash time that each photo needs according to the diaphragm placed, cutting the brightness when it has enough light. The diaphragm to be placed is given by the flash and you can usually choose between survival diaphragm values. However, with the automatic flash, nothing that reduces the light intensity (filters, stretching tubes,... for example) cannot be put to the target, the flash head must always be oriented towards the subject and it is not possible to approach the subject too closely. (If we use the manual, we can make corrections.)
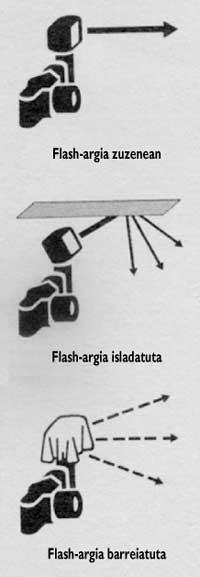
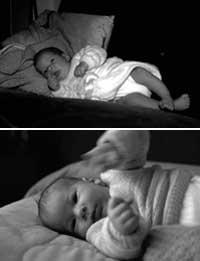
On the other hand, by placing the flash on the camera and looking at the subject, there is too intense illumination (with the effect of “red eyes”). To avoid this, you can place the appliance by looking at a reflective surface.
The light can be reflected by looking at any white surface (towards the ceiling, the room wall, the white or silver cardboard, etc. ). This will increase the diaphragm by two points.
If you do not have the possibility to reflect the light, you can ridicule by placing before the flash anything bleached (calcar paper, fabric or similar).
The flash can also be used with daylight. Sometimes, in situations of intense contrasts, despite being sufficiently illuminated to take a photo, you run the risk of the shadows being too dark. The solution is to use the "fill in flash" technique. This technique allows the light output correctly the shadow without oversaturating.
However, when choosing the exhibition we must be careful, unless the main focus of light is flash. To know which diaphragm aperture is convenient, it is enough to have one or two points below what we would need if only the photo was illuminated with the flash and, subsequently, calculate the shutter speed corresponding to the clear day for that diaphragm (if it is higher than the synchronization speed, we will have to cover the flash with a cloth or with a speed drop step for each bending of it).
Finally we have to mention the TTL flash. TTL stands for "throught the lens" and means "along the lens".
This way the flash works completely automatically and the exposure is calculated through the target.
Zu idazle
Zientzia aldizkaria